Anastasia Beverly Hills has gained popularity for its high-quality makeup products, including their gel liner. To help you get the most out of your Anastasia gel liner, we have curated a list of 4 articles that offer tips, tricks, and tutorials on how to use this product effectively. Whether you're a novice or a seasoned makeup pro, these articles will provide you with valuable insights on creating flawless eye looks with Anastasia gel liner.
5 Tips for Perfecting Your Winged Liner with Anastasia Gel Liner
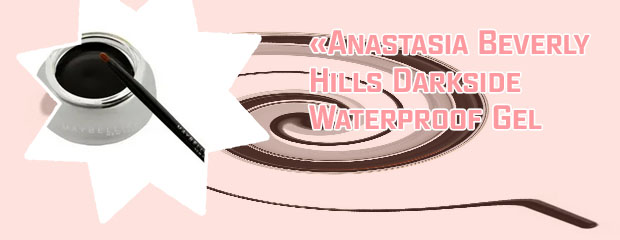
Achieving the perfect winged liner look can be a daunting task for many makeup enthusiasts. However, with the right tools and techniques, it is definitely possible to achieve a flawless finish. One product that is highly recommended for creating the perfect winged liner is the Anastasia Gel Liner. This gel liner is known for its long-lasting formula and intense color payoff, making it a favorite among makeup artists and beauty enthusiasts alike.
When using the Anastasia Gel Liner to create a winged liner look, there are a few tips that can help you achieve the perfect result. Firstly, it is important to choose the right brush for application. Using a fine angled brush will give you more control and precision when creating the wing. Secondly, start by outlining the wing before filling it in. This will help you create a clean and sharp line. Thirdly, take your time and build up the intensity gradually. This will help you avoid mistakes and ensure a flawless finish.
Additionally, using small, short strokes will help you achieve a smooth and even application. Finally, don't forget to set your winged liner with a translucent powder to ensure it stays in place all day.
In conclusion, mastering the art of winged liner with Anastasia Gel Liner requires practice and patience. By
Step-by-Step Tutorial: Creating a Smoky Eye with Anastasia Gel Liner
I recently had the pleasure of trying out a step-by-step tutorial on how to create a smoky eye using Anastasia Gel Liner. The tutorial was easy to follow and provided clear instructions on how to achieve the desired look.
The tutorial began by explaining the importance of priming the eyelids before applying any makeup. This step helped to create a smooth base for the gel liner to adhere to. Next, the tutorial demonstrated how to apply the gel liner to the upper and lower lash lines, blending it outwards for a smudged effect. The technique of layering the liner and blending it out gradually helped to create a seamless transition from light to dark.
One of the standout features of the tutorial was the use of different tools to achieve the smoky eye look. In addition to using a brush to apply the gel liner, the tutorial also recommended using a smudging brush to soften the edges and a blending brush to create a gradient effect. These tools made it easier to control the intensity of the smoky eye and achieve a professional-looking finish.
Overall, the tutorial was informative and easy to follow, making it suitable for beginners and experienced makeup enthusiasts alike. I would highly recommend it to anyone looking to master the art of creating a smoky eye with Anastasia Gel Lin
How to Make Your Anastasia Gel Liner Last All Day: A Comprehensive Guide
Anastasia Beverly Hills has become synonymous with high-quality makeup products, and their gel liner is no exception. If you're tired of your eyeliner smudging and disappearing by midday, this comprehensive guide is for you. With the right techniques and products, you can make your Anastasia gel liner last all day.
First and foremost, preparation is key. Make sure to start with a clean, dry eyelid to ensure maximum longevity. Using an eyeshadow primer can help create a smooth base for the gel liner to adhere to. Additionally, setting the liner with a coordinating powder eyeshadow can help lock it in place.
When applying the gel liner, use a fine-tip brush for precision and control. Start by drawing a thin line along the lash line, building up the intensity as desired. To prevent smudging, allow the liner to dry completely before opening your eyes fully.
One practical use case for following these tips is attending a long day of important meetings. By using the techniques outlined in this guide, you can feel confident that your eyeliner will stay put throughout the day, helping you maintain a polished and professional appearance. With a bit of practice and the right tools, you can enjoy flawless eyeliner that lasts from morning until night.
Mastering the Cat Eye Look: A Guide to Using Anastasia Gel Liner
none